Where the autistic get artistic.
[Return] [Entire Thread] [Last 50 posts] [First 100 posts]
Posting mode: Reply
Name
Email
Subject   (reply to 1185)
Message
BB Code
File
File URL
Embed   Help
Password  (for post and file deletion)
  • Supported file types are: FLV, GIF, JPEG, JPG, MP3, OGG, PDF, PNG, RAR, SWF, WEBM, ZIP
  • Maximum file size allowed is 25000 KB.
  • Images greater than 260x260 pixels will be thumbnailed.
  • Currently 1085 unique user posts.
  • board catalog

File 130600880749.png - (7.47KB , 344x216 , diy_.png )
1185 No. 1185 [Edit]
DIY stands for Do It Yourself; anyone into it?

There's loads of dedicated wikis and forums on the subject, so I want to relate it with TC. Being hikki, neet, unnormal, social outcast or what have you, may imply that money gets tight, but free time maybe not. Doing/making it yourself instead of buying it can help the shorts meet the ends.

I'll use myself as an example:
I don't work, and I don't intend to anytime soon either. I love music, and I want it to sound its best, so I look to hi-fi. Hifi is expensive, but it can be made by amateur hands if you know what you want. I could invest in a $2000 amp.. or I could make one myself for $200. The money you save by making what can be made by common folk yourself can be spent on what can't be made by common folk - like computers or figurines. Hell, computers can be assembled by anyone, servers can be old, repurposed hardware, and a chassis can be whatever you want. If you're modest about your needs, even figurines can be made by hand - through clay, paper, wool, repurposed dolls and maybe open source 3D printers in the near future.

Imagination is the limit, and all you need is the right material, time and a will to make it happen. The down-side is that material can be hard to find, good end-result is not guaranteed, skill can be limiting, learning process can be exhausting and there are hazards if you're not careful.

I hope we can get a nice thread going if there's interest, and my hope is that we can help, motivate, share and lift up eachother and make some great stuff. I'll be sharing ideas, projects and works in due time.
Expand all images
>> No. 1186 [Edit]
I've wanted to build a kotatsu but I literally have no more room in my room for anything
>> No. 1187 [Edit]
>>1186
That's another great reason for making stuff yourself:
Create stuff that can't be bought.

About your dilemma, if you'd be willing to "convert" to the kotatsu way of chilling by a table, you could throw out your ordinary western-ish desk, place your computer on/by the table and have that as your battlestation. Might be cosy. Some might object that it'd be way too hot in the summer, but the oven in a kotatsu can obviously be turned off, so I think it can be done.
>> No. 1188 [Edit]
>>1187
Even my ordinary desk is almost too big for my room, having a real table would take up almost all of what little walking space I have. No, I'll just have to add having a kotatsu to the already long list of things I'll do if I can ever move out
>> No. 1189 [Edit]
>>1188
On the bright side, you could always make some fancy prints.
>> No. 1190 [Edit]
File 130601019270.jpg - (14.93KB , 240x180 , Phone.jpg )
1190
I'm always amazed by what can be made on your own. Like this cellphone for example:
http://www.opencellphone.org/index.php?title=Main_Page

I'm not into DIY much myself though, unless you count writing computer programs.
>> No. 1191 [Edit]
>>1190
It's about perspective, I think. If you're painting a picture to decorate your room just because it would be nice, then it might be viewed as a DIY project of sorts. If you paint a picture to express yourself, then it's something more - it's art.

To me DIY is about the facination in what can be done by oneself, so I do indeed share your amazement when viewing certain showcased projects. Whatever practical bonus is achieved in the process is a bonus when undergoing such projects oneself.

Really cool example, that TuxPhone. Keep them coming if you ever stumble upon something interesting.

Post edited on 21st May 2011, 3:40pm
>> No. 1192 [Edit]
How tall is a kotatsu supposed to be anyway?
I'm pretty big myself, so the standard size is probably not a good idea.
>> No. 1194 [Edit]
>>1192
12.992 inches or 33 centimeters is average length of the legs
>> No. 1195 [Edit]
Check out Hak5, they show how to build pretty cool stuff like a custom DDR dance mat, arcade cabinets and so on.
http://hak5.org/category/episodes/season_1

Also http://www.instructables.com/ is a huge resource.
>> No. 1196 [Edit]
>>1190
That is so amazing.
>> No. 1205 [Edit]
File 13064665137.jpg - (768.90KB , 1500x675 , DIY.jpg )
1205
Not really sure it it counts becuase of how simple it was, but..

The old chair I used to use busted, tryed fixing it by tieing it together a number of times, wasin't untill the sixth time that it held, but the chair was killing my back, so I bought a new one, and was left with the old one sitting around.

My mom wanted to toss the old chair, but I took it apart, ran to a home depot for a board, paint and some screws, and made the old chair into a table, as shown.
it's a little unlevel, in spite of trying to balance it out with washers, and it's off center.. but I don't think it turned out to bad.

Post edited on 26th May 2011, 8:23pm
>> No. 1206 [Edit]
>>1205
Ooh, clever.
>> No. 1208 [Edit]
>>1205
Creativity is more important than execution, I say. That's creative thinking right there; it doesn't matter if the end result is conceived as flawed, because you leveled up your diy.

Post edited on 27th May 2011, 9:44am
>> No. 1223 [Edit]
Are you a bad enough dude to build your own MAME cab?

http://chris.polymathic.net/cabinet/index.shtml

This is one of my long time projects but I still haven't find the strength to look for all the materials.
>> No. 1224 [Edit]
I want to make a woodworking table. I'll finish up the designs and start construction when my exams finish, which is 25th of june.
>> No. 1234 [Edit]
File 130730454444.jpg - (1.06MB , 1600x1200 , IMG_1678.jpg )
1234
>>1223
I've thought about it, doing my own version and stuff, but my motivation is non-existent since I quit playing fightans, and I'm not much into retro gaming.

>>1224
Funny, I'm doing just that right now. I'll post what I've got so far, and do a more thorough write-up when things start coming together. It will sport at least one novelty, so let's see how it turns out. It should be done by next week.

Here's the framework that will be supporting the top plates (2). You can use these when building walls, so its quite sturdy altogether.
>> No. 1237 [Edit]
File 130730551444.jpg - (639.46KB , 1600x1200 , IMG_1705.jpg )
1237
Here's a close-up on one of the corners on the top-side of the framework. The purpose of the triangular piece is to add enough platform space for the legs which you may see circled out across the piece and the beams in the previous picture. The wood has been processed with machined sanding, tree mass in the various cracks, more sanding and special coating for the black spots (it's pine), as the framework will receive a solid color.

Next up is the top plates, tomorrow.
>> No. 1247 [Edit]
Hmm, a build log might not be so interesting after all, so I'll just dump some pictures when it's ready for use. I might ask for suggestions and opinions at that point, but otherwise it's pretty clear for me what needs to be done with the table. It's ready for assembly tomorrow anyway, as the last coats of paint and lacqeur are drying as I write.

Post edited on 9th Jun 2011, 1:26pm
>> No. 1248 [Edit]
>>1247
>Hmm, a build log might not be so interesting after all

I like it.
>> No. 1255 [Edit]
>>1234
Very nice. Appears to be very clean and carefully made. Im feeling a little jealous now because I intended to make my woodworking table out of recycled wood and make it extremely sturdy without giving a crap about how ugly it looked.
>> No. 1268 [Edit]
File 130789123452.jpg - (705.31KB , 1600x1200 , IMG_1764.jpg )
1268
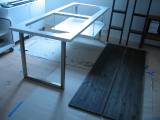
Thanks for the response. There's been a delay because of a mishap with the finish on the top-side of my top plates, so I have to use the bottom side instead, but need more oil the finish it up. Otherwise it's done. Another layer of colored oil, and lacqeur on the top plates, some screws and it's good to go. You can see the table's mentioned novelity in the attatched picture - it's a second plate for semi-concealed floating storage. One of the top plates will be cut in half, ofwhich the half above the floating bottom plate will be turned into a hatch via piano hinges.

What I might change is the color of the framework and maybe the bottom plate as well. What I probably will change is the feet. They work very well as is, and are certainly most practical, but I might want to build something out of woood to mesh better in with the rest of the table - something massive, i.e. a width similar to the beams used in the framework, with a special design. Could make out a cool fix.

>>1255
Sounds risky, but if you can scavange good material without making dear sacrifices, that should be as good as anything - honestly. Wood is usually easy to work with; oil it, paint it, sand it, cut it, fill it, whatever. Once you make yourself familiar with the type of wood you're working with, you'll see the opportunities. Making it look pretty will obviously demand more workpower, and it doesn't look to be on your agenda, but as long as your hands are dirty, you can always do little tweaks here and there.

Post edited on 12th Jun 2011, 8:39am
>> No. 1269 [Edit]
File 130789324881.jpg - (247.91KB , 1024x768 , gun.jpg )
1269
I've been thinking of making my own gun for awhile now, but I'm short on parts.
>> No. 1270 [Edit]
>>1269
Something fallout-esque would be awesome. You could try using whatever you can, even if it wouldn't turn into a working gun.
>> No. 1271 [Edit]
>>1269
That's insane, if you know how to make a gun out of parts like that.... that's crazy.

Just please tell me you're not going to use the gun for what I hope you're not going to use the gun for.
>> No. 1272 [Edit]
>>1271
>That's insane, if you know how to make a gun out of parts like that.... that's crazy.

Guns are the easy part and pretty simple to make. Rounds are the hard part.

>Just please tell me you're not going to use the gun for what I hope you're not going to use the gun for.

Relax, I am going to use it for insurgency when the time comes to defend my homeland.
>> No. 1273 [Edit]
>>1269
That thing in the pic can't possibly work...
>> No. 1274 [Edit]
>>1273
It does, but it appears that you have to manually chamber each round.
>> No. 1275 [Edit]
>>1274
Well that much is obvious, but I don't see any hammer mechanism either...

That thing was probably just built for kids, so they could have something that looks remotely like a gun. Or something along those lines...
>> No. 1276 [Edit]
>>1275
The hammer mechanism could be the the lever which in normal guns cycles the round. When released it strikes the bullet.

Also.
http://englishrussia.com/2007/06/04/chechen-self-made-weapons/
>> No. 1277 [Edit]
>>1276
>lever

Meant bolt*
>> No. 1803 [Edit]
http://rice-bubble.blogspot.com/2012/03/light-box.html

Did This for what it counts.
>> No. 1805 [Edit]
>>1803
GJ, man!

Also, it's been a while since I posted on this thread, update on this project:
>>1268
I'm changing the bottom plate as of now, and have decided not to make any major changes on the top plates, so they will stay solidly attached to the framework. The feet I would only bother chaning if I could manage to come up with a soloution that won't bend the feet vis a vis the other half if ever pushed to one side or the other, as they in the current setup. Next thing on the list would be to do some polishing touches to streamline everything. I'll get up a picture when ver. 0.2 is done. My main goal in this version is to make it less prone to cable mess.

Another project I've been working on is the making of a custom PC cabinet, though still in early developing/prototyping stages. I might do some post up a couple of log entries, but this is niché territory.
>> No. 1810 [Edit]
File 133489351942.jpg - (319.39KB , 1920x1080 , DSCF0033.jpg )
1810
Last week I decided to finally try to make some homemade wine. A bag of cranberries that had been occupying my freezer for far too long was used for the first bottle. I boiled the cranberries in water, just as one would do when making cranberry sauce, and then poured the liquid into an empty whiskey bottle. The still-hot water allowed me to both sanitize the bottle (apparently, bacteria can ruin the fermentation and turn the concoction into vinegar) and to dissolve the one cup of sugar that was added to the mixture. Keeping it cheap and easy for my first attempt, I just added some baker's yeast once the mixture had cooled and affixed a balloon with a couple of tiny pinholes in it to function as the airlock.
Here it is a week later, and while it's still fermenting a bit, I really wanted to try it. After filtering a cupful through a coffee filter, I was really surprised at how good it was, especially considering how little time and money went into it! The flavor lacks complexity, but is certainly pleasant, basically tasting like alcoholic cranberry sauce.
I also have a bottle of strawberry wine that I started a couple of days ago. The cranberry turned out so well that I think I'll order some proper brewer's yeast. Even if it's pricier, I get the fruit while dumpster diving, so I'm still going to be making this stuff for way cheaper than it can be bought.
>> No. 1913 [Edit]
File 134094637385.jpg - (353.05KB , 1920x1080 , DSCF0037.jpg )
1913
These couple months of crude winemaking have gone so well that I've decided to branch out into distilling. I already had the teakettle, so all I had to purchase was the copper pipe and a rubber stopper. The construction was simple enough; I bent the copper pipe into a coil around an empty bottle and made a hole in the stopper to insert the pipe into. The coil passes through a cut-open plastic jug, with a bit of silicone caulk sealing the hole it exits at the bottom. After filling the jug with cold water, the still is ready to go.
The only run I've done so far was with some kiwi-pineapple wine that had turned out surprisingly bad. The distillation process doesn't take long at all, maybe fifteen minutes of boiling at most before I was starting to get water out of the pipe. The results were astoundingly drinkable; perhaps around sixty to seventy proof, nice and smooth, with kind of a bright, funky flavor that is definitely unusual but still enjoyable.

Post edited on 28th Jun 2012, 10:09pm
>> No. 1947 [Edit]
File 134680002065.jpg - (536.70KB , 1200x900 , RC.jpg )
1947
Tried painting a RC car over the last few days.

Can't say I'm crazy about how it turned out.
many of the edges where I taped off came out looking like trash.
and I guess I didn't use enough clear coat, it left a ugly bumpy texture to it all over.
might tape up the windows again and give it another pass over.
still planing on adding some decals latter, and turning it into an itasha.
>> No. 1948 [Edit]
File 134680024934.jpg - (550.97KB , 1200x900 , RC2.jpg )
1948
>>1947
>> No. 1949 [Edit]
>>1947

I'd say try another coat..if you think you could get it on there without creating any ugly textures.

Also the chrome wheels are better, I think.
>> No. 1950 [Edit]
>>1224
Funny, one year later and I still haven't started on that woodworking table. I'll start it when this semester finishes..

Also I've got another project in the works. I'm going to make a flashing taillight powered by bicycle wheels. I've taken a medium sized motor from an old heater. Now i'll just need to make the flasher circuit, test the output of the motor and see if I have to make any changes so it can flash.
>> No. 1951 [Edit]
>>1947
>>1948
went into more details here.
http://rice-bubble.blogspot.com/2012/09/custom-rc-paint-job.html
>> No. 1968 [Edit]
File 135013571888.png - (1.41MB , 1200x939 , table2.png )
1968
>>1950
It happens. Time, motivation and excess energy can be hard to get by at times, even years.

In other news, I built another table, for various reasons. As pictured, it needs polish and oil and it'll be good to go. Might go into details later, but I haven't been in the mood to post stuff on the internet lately.
>> No. 1969 [Edit]
>>1968
Looks really sturdy. Is it going to become a new workbench for you?
>> No. 1970 [Edit]
>>1969
Sturdy indeed. My goals with it was for it to be simple, sturdy and easy to make. Its purpose is however to be my common desk. I have a thing for industrial design, you see. What happened with the first table I made was that it started bending in the middle - giving in to gravity. My disappointment was substantial, so there you go. It was with that lesson in mind that I made the new one. As for my actual workbench I use some ikea table, as their stuff is virtually indestructible.

That being said, I don't plan on ditching the first table I made, just repurpose it in some shape or form. Have it be some kind of gathering point maybe, I don't know. I'm adding a 5th foot in the middle of it and hope that fixes it or at least prevents further gravitational damage. It was a great learning experience anyhow; I never banked on it being perfect the first time around.
>> No. 1971 [Edit]
>>1970
Ah. Yeah, I like the design, too. If it's going to be the desk you spend most of your time at when you're at home, you could mount a little kotatsu heater to the underside and save a lot of money on heating this fall/winter. A normal space heater still works fine for me, though.

I'd probably set the old desk up adjacent to the new one in an 'L' shape, if they look similar enough and the repair on the old one keeps it usable. Would make for a pretty cozy workspace.

What length and width is the table top?
>> No. 1972 [Edit]
>>1971
Thanks for the complements, and the ideas. The tabletop dimensions are 1.5 by 0.8 meters, or 4.92 by 2.62 feet, or 4' 11" by 2' 7.5", or what have you. The old one is about half a meter longer. Honestly, though, I really should consider some heater stuff, as my feet and knees tend to get really cold when I sit tight.
>> No. 2039 [Edit]
File 135979273715.jpg - (470.49KB , 1200x900 , display case progress.jpg )
2039
Display cases are freaking expensive. So I decided to build a simple one for a few of my figs out of scrap wood and some plexiglass.
Like a dumbass I accidentally cut one of the side panels down the wrong side so I might use it to make another smaller case. unsure at this point weather or not I should paint it or use it as is.
>> No. 2040 [Edit]
File 136002921365.jpg - (719.20KB , 1200x900 , box small version.jpg )
2040
>>2039
This is the smaller case I made using that miscut piece. Far from perfect I know. honestly not sure how to attach the clear plastic stuff. used wood glue becuase it's pretty strong stuff, but it doesn't seem to attach very well to the acrylic, and leaves a ugly yellow color.

Post edited on 4th Feb 2013, 7:06pm
>> No. 2044 [Edit]
>>2040

Have you tried regular superglue or an epoxy to make the acrylic stick to the wood?

otherwise, a case made sololy of acrylic with some acrylic bonder to hold it together will be very surprisingly sturdy and light weight.
>> No. 2045 [Edit]
>>2044
Nah, but I should.

might try pure acrylic latter on, but for now I'm finding it a pain to cut. one of the pieces I cut out split slightly away from the cut line, make me worried about doing bigger sheets. the panels for the main case I was working on would be 24 inches long, and I rather not have to buy another one should I mess it up, so I'm taking the time to cut the thing all the way from one side to the other with a razor blade. it's a pain in the butt so far. maybe latter on when I get better tools I'll try messing around with the stuff more.
>> No. 2046 [Edit]
>>2045
>with a razor blade. it's a pain in the butt
dear lord, that has to be the slowest and most physically difficult and painful way to cut the stuff that I've ever heard of.

I would recommend going at it with a hack saw and then a metal file if you really need the edge to look perfect.
>> No. 2047 [Edit]
File 13602090708.jpg - (625.97KB , 1200x900 , dumbcamura.jpg )
2047
>>2046
The only saw I have is a jig saw, which I tested on a scrap piece, and it shredded the piece. but yeah, using a box cutter on it has taken hours so far. passed the time by getting in some anime in the background. When at the hardware store they didn't seem to have any tools in the acrylic sections, other than box cutter type things similar to what I'm using.
A hack saw sounds like it might crack or brake up the acrylic, but I'll try it out next time.

Here's the smaller box put in place with some lights attached. Big enough for two 6' figs. unfortunately it doesn't close all the way on it's own...
>> No. 2048 [Edit]
>>2047
>A hack saw sounds like it might crack or brake up the acrylic, but I'll try it out next time.

A hack saw shouldn't crack or break anything if a correct dose of common sense is applied beforehand, even for cutting stained glass.

go slowly, don't put much if any pressure toward the cutting surface (acrylic is quite soft, you can scratch it with a fingernail even, the saw teeth don't need help to rip dust-sized chunks out of the thing), and don't let the area heat up too much.

As far as sawing goes, it'll take a while, but it'll still be very much faster than the razor approach.
>> No. 2049 [Edit]
File 136021860371.jpg - (34.14KB , 500x269 , scribe.jpg )
2049
>>2047
Are you cutting in the same way demonstrated in this video?
http://www.youtube.com/watch?v=U7cquDldE0Y

If so I highly recommend you buy a clamp, scribe, and t-square.
I cut some plexiglass a while back to build a skylight window for my poultry barn. Worked like a charm. I might cut some more in the future to make a light box I'd use for animating my paintings.

Nice display case by the way.
>> No. 2050 [Edit]
>>2049
yeah similar to that, only that I'm a bit nervous about doing the snapping part on larger pieces. There's really a ton of tools out there I could use, for that matter a decent area to work might be nice too. might also add that the process has busted up a few of my box cutter blades so far.
and thanks.

Post edited on 6th Feb 2013, 11:07pm
>> No. 2051 [Edit]
>>2047
Good!
>> No. 2060 [Edit]
File 136074174856.jpg - (637.12KB , 1200x900 , display case.jpg )
2060
Finished this case. could have been a lot better, tons of crooked cuts and ugly dried glue all over.
Lighting isn't very good, probably gonna install some LEDs once I get some more.
In retrospect I realised this thing will only fit 7 of these figs, and even then it might be a bit cramped. May have to build something bigger in the future for all 11, but I guess it works for the mean time, might use it for other figs if the time comes to go bigger.
Tried painting a sky background for it, but that came out like crap, and it's a little too big to do something printed. I guess solid blue looks better than nothing, but still feels kind of bland.

Still better than buying something similar, which might run like $40. If nothing else, it does the job. keeps dust off and makes more space for figs.
>> No. 2061 [Edit]
>>2060
Looks really good! I agree about the lighting and the blue looking a bit bland, but that can all be improved on without much hassle, right?

Nice job.
>> No. 2062 [Edit]
File 136107299173.jpg - (852.02KB , 1500x1125 , DSC03642.jpg )
2062
Added some clouds cut out of scrap paper. looks a bit corny, but better than nothing I guess and was quick & easy to do.

Still needs some LEDs, but I remembered a little trick for getting decent quality pictures out of crappy cameras or things in low light. just take a bunch of pics from the same exact position, and overlap them with a bit of transparency.

anyways, working on some shelves currently for more figs, I'll post pics latter I guess.
>> No. 2063 [Edit]
File 136116489645.jpg - (747.37KB , 1200x900 , triangles.jpg )
2063
>>2062
and here's a progress pic. making em all outa triangles. and figured if I was gonna cut them shapes and stuff out, might as well repeat the process a few time and make some extras for two other shelves.
>> No. 2064 [Edit]
File 136116578128.jpg - (894.92KB , 900x1200 , triangles2.jpg )
2064
>>2063
and some more progress I guess
>> No. 2065 [Edit]
File 136135168716.jpg - (571.46KB , 1200x900 , triangles3.jpg )
2065
>>2064
Here they are all put together and stuff
>> No. 2066 [Edit]
File 136135214573.jpg - (592.50KB , 1200x900 , triangles4.jpg )
2066
>>2065
and this is how looks put in place.
Kinda wanted to use the space to make another enclosed case, but it would have been a pain to work around that big bar.
>> No. 2067 [Edit]
>>2062
>>2066
Fucking great!

I'm terrible at building things but I may have to do something similar real soon; I have 5 figures in their boxes (and more on the way) cause I have no place to display them anymore.
>> No. 2068 [Edit]
>>2067
Thanks, and yeah it's certainly a lot cheaper than buying shelves for like $10+ each.
>> No. 2130 [Edit]
File 136512203657.jpg - (658.25KB , 1200x900 , case3.jpg )
2130
>>2062
Same case after installing some LEDS, and replacing the blue/Purple lights around it.
>> No. 2132 [Edit]
>>2130
Cool clouds, mang.
You haven't thought of printing out a photo of a skyscape? Or even better, a sky from the show with a neuroi in it or something? I think it'd look a lot better.
>> No. 2133 [Edit]
>>2132
Printing out a background for something that big would require like six full pages tiled together. I'd just rather not use up that much printer ink. did however toy around with the idea of making a papercraft neuroi to go with it.
>> No. 2306 [Edit]
File 139296232528.jpg - (470.76KB , 1200x900 , room 21914.jpg )
2306
Been working a little bit here and there lately on a 1/12 scale replica of my current room.

Shown is mainly just the base with some stuff on the edges and in center for the floor which will sit on top of that. To the side is where the closet will go, it's what I'm currently working on. making it more or less accurate with sliding doors will take some time.
I should also note that I designed this model so the closet wall and the wall parallol to it would be removable for easy viewing and photo taking later. only the wall with the door and the one opposite to it will be placed permanently. After giving it much thought I think I'll be using strips of velcro to keep the walls in place.

I thought about incorporating lights, but the thing will be complex and time consuming enough as is.
Must admit, I'm rather looking forward to replicating everything around me in small scale. Most items in here should be simple enough I figure, but when it comes to the figures, dolls, & toys I'm probably just gonna use cut out printed photos, kinda of like card board cut out displays.

Post edited on 20th Feb 2014, 10:07pm
>> No. 2307 [Edit]
>>2306
I think you'll do great.
>> No. 2316 [Edit]
File 139492647567.jpg - (606.67KB , 1200x900 , room 31514.jpg )
2316
>>2306
It's been real slow goings so far. Done building the closet, just gotta paint it now. took a while to get the doors working right and stuff. not even really sure why I'm bothering with the inside of the closet when making small scale replicas of everything in my closet would be way to much of a pain.

Took a walk around a place with a ton of fabrics to pick from, got the nearest thing I could find to my carpet. not perfect but should be 'okay'.

Few days ago I realized I accidentally glued the wall with the door in place upside down and backwards. shouldn't be too hard to fix.
>> No. 2317 [Edit]
>>2316
that's looking great.
>> No. 2323 [Edit]
File 139564396153.jpg - (792.25KB , 1200x900 , 32214.jpg )
2323
>>2316
Been painting it over the last few days. Paint I've been using caused the walls to warp inwards, but I was able to fix that by painting the opposite sides then laying it flat and leaving some light wights on it to flatten it out.
Kinda regret not using wood for this project in light of that.
once the painting is done I should be able to get the carpet in place, then start making furniture and decorating it. Thats when it'll really start coming together.

Rather pleased with how the door is coming. opens and closes with the correct size hinges in the right spots. I'm planing on sticking a photo taken from my doorway behind it.

went over a number of ideas for how to make the walls removable for easy photographing and stuff latter, and finally settled on a track type system on the corners of each wall. seems to work pretty well.

this project is really making me wish I had a 3d printer, would make replicating my shit in small scale so much easier...

Also still undecided on what to do for lights, if anything at all.

>>2317
thanks
>> No. 2325 [Edit]
File 139676569610.jpg - (598.62KB , 1200x900 , room 04 3 2014.jpg )
2325
>>2323
another update. Done painting. Got the carpet in place (kind of a pain in some areas) and installed some shelves. currently working on the couch as shown. left a figma in place for size reference and stuff.
>> No. 2327 [Edit]
File 13973768662.jpg - (562.71KB , 900x1200 , room 04 13 2014.jpg )
2327
>>2325
Finished my bookshelf today. thing was kinda a pain, what with getting all the parts lined up properly and what not. Tried printing out some posters and stuff but seems the color ink in my printer craped out. Shana wallscroll was fine so I used it but the aria one needs to be reprinited, just got that up with some tape.
this room sure is slow goings...
>> No. 2328 [Edit]
File 139737726556.jpg - (803.65KB , 1200x900 , room 04 13 2014 2.jpg )
2328
>>2327
and the current progress on the couch. making it functional, with a back that can go up and down, has proven to be a challenge from a design stand point, but whatever should be done in a day or two. Should also point out the material I'm using to cover it is taken from the original couch, it was peeling off anyways so I figured why not.

Post edited on 13th Apr 2014, 1:24am
>> No. 2331 [Edit]
>>2327
God damn, at this rate your model room might end up looking nicer than the real thing.
>> No. 2334 [Edit]
File 139944702732.jpg - (467.39KB , 1200x900 , room 05 07 2014.jpg )
2334
>>2328
Figured I was over due for an update.
So I finished up the couch then worked on the display shelves in the corners. couldn't find any chrome paint so just used silver, and after spilling out to much of it I scrambled to make some other items I could paint silver. that being the speakers.
also put up some small versions of >>2065, they were pretty easy to do.

Currently working on my dresser, then I'll give my display cases a shot to fill in the space on that wall. My 'battle station' is gonna prove to be a pain once I get to it, I just know it...


>>2331
Thanks?

Post edited on 7th May 2014, 12:24am
>> No. 2336 [Edit]
File 139944753324.jpg - (604.42KB , 900x1200 , room 05 07 2014 2.jpg )
2336
>>2334
These things ended up taking a lot longer to make than I would have thought..
>> No. 2342 [Edit]
File 140057110749.jpg - (461.34KB , 1200x900 , room 05 20 2014 2.jpg )
2342
>>2336
Whelp I've finally finished my dresser thing, and the table I made here >>1205
I could have probably done the dresser in just a day or two had I not cared about functionality, but what can I say? thought it'd be neat to store tiny stuff in there or something. would add to the detail if nothing else.

I admitting kinda half assed the table and didn't give it as much detail as I could have. just figured since it'd be hard to see the bottom wouldn't matter much anyways.
>> No. 2343 [Edit]
File 140057184628.jpg - (606.15KB , 800x1200 , figs.jpg )
2343
>>2342
Also went and made some bases for some tiny keychain figs I had. since before starting this I had no clue how to do my figs, and eventually figured I'd just copy them with a 3d scaner and reprint scaled down versions and paint em. I'd rather not leave to many things in there that aren't in my real room but they kinda work.
I think the Takane fig looks kinda off though, like a little too big maybe. The Tohno one though is the perfect size I think, just about what a 1/8 would be.

gotta say, it's pretty cool how tiny stuff can suddenly feel really big just by dropping it in there.
>> No. 2344 [Edit]
File 14005720948.jpg - (742.34KB , 1200x900 , dresser.jpg )
2344
>>2342
And here's something just to show how it looks opened.
>> No. 2367 [Edit]
File 14037688753.jpg - (578.52KB , 900x1200 , room 06 26 2014 2.jpg )
2367
Been a while since my last update. Haven't really gotten much done since then. Only addition is this display case I finished today. I think the finish came out nicely and looks like the full size one (used airbrush for it), but the hinges and bolts came out like ass.
I'd have gone on to my other fig case but haven't been able to find large enough pieces of clear plastic for that.
>> No. 2378 [Edit]
>>2367
Damn. That all looks great. How long have you been making miniatures for?
>> No. 2379 [Edit]
>>2378
Maybe a year or so I guess. I didn't really make many miniatures before this room, only a handfull of items to go with displays I made.
Thanks btw.

Post edited on 23rd Jul 2014, 3:07pm
>> No. 2381 [Edit]
File 140624690671.jpg - (570.13KB , 900x1200 , 07 24 14 3.jpg )
2381
Here's a shot with the other display case of mine in place. Also started doing some of my posters.

If anyone's interested there's a bit more pics/detail here
http://rice-bubble.blogspot.com/2014/07/mini-room.html
>> No. 2382 [Edit]
File 14062472606.jpg - (678.52KB , 1200x900 , 07 24 14 2.jpg )
2382
Finally got around to reprinting this wall-scroll, and giving it some detailing.
Someday I'll get around to filling that bookshelf with dvds and stuff.
>> No. 2383 [Edit]
File 14062474299.jpg - (551.19KB , 1200x900 , 07 24 14 4.jpg )
2383
Not much new here. Found a tiny delorian that works well as a stand in for the 1/15 scale one I keep in the same spot.
>> No. 2384 [Edit]
The details are really incredible!
But for a room with so much stuff in it, I wonder how big of a project you're undertaking, even if you're only going to recreate a representative sample of the figures and such.
>> No. 2386 [Edit]
>>2384
In some ways I view it as a never ending project. There's always gonna be something to do. At least I have the majority of the furniture finished. Can't much say I'm looking forward to doing my computer area though. The smaller stuff would be easy with a 3dprinter I think, but since I'll probably never afford one I dunno. just gotta do what I can.
>> No. 2387 [Edit]
>>2386
Are you gonna include a mini-you someday?
>> No. 2388 [Edit]
>>2387
I would if I could make custom figs, but that's a little out of my league.
>> No. 2389 [Edit]
>>2388
Your avatar? it can't be so hard to work from some figma. Give it a shot someday, if you want to. After seeing your models I have faith in you.
>> No. 2393 [Edit]
File 140730567779.jpg - (517.31KB , 900x1200 , lights.jpg )
2393
I was planing on starting on the lights, but when testing them out I found that they don't look very good at all. I can trim off the parts blow and above the leds, but even so they seem like they'd be too big and spaced out. these are actually the same led strips used in the full sized room that I had spares of. I've looked around online but couldn't find any lights that would work better. I think I've seen small light strings in the past but can't remember the proper term for them.
edit: just found out about something called "el wire" might give that a try.

I'd love to get your thoughts and opinions on this here.

>>2389
I gave it some thought and think I might be able to pull it off by combining parts from the ritsu, f/sn rin, and maybe Ryomou Shimei figmas.

Post edited on 5th Aug 2014, 11:26pm
>> No. 2394 [Edit]
>>2393
EL wire would probably work. You could also try placing a frosted strip of acrylic in front of the LEDs to diffuse the light, maybe recessed in the wall to simulate the look of your real room.
>> No. 2395 [Edit]
>>2394
>You could also try placing a frosted strip of acrylic in front of the LEDs to diffuse the light, maybe recessed in the wall
lol, that same exact thought crossed my mind too.
>> No. 2400 [Edit]
File 140822411334.jpg - (467.70KB , 1200x900 , elwire demo.jpg )
2400
Okay so the el-wire I ordered finally showed up today. To my dismay, it was a lot more dim than expected. It barely lights up my mini room at all.

Does anyone with any knowledge of el wire know if it's possible to increase the brightness? say add some more batteries or run it off a 9v maybe? or would that burn out the light?
>> No. 2401 [Edit]
>>2400
https://www.sparkfun.com/datasheets/Components/LED/Technical%20Information%20of%20Flexible%20Neon%20wire.pdf

I found this spec sheet which states it's good from 20-220v. I don't know if your specific model is the same but you will probably be fine with higher voltages.
>> No. 2402 [Edit]
>>2401
>20-220v.
that's strange becuase they almost all seem to be sold with power packs meant for two AA batteries, which is about 3v I believe?
>> No. 2403 [Edit]
>>2401
>>2402
whelp I tried cutting a piece off and connecting it to a 9volt battery. it wouldn't turn on. It didn't burn out though, becuase I connected it to the 2AA pack and it lit up okay. I think the pack might be converting the power from ac to dc or something like that.
>> No. 2404 [Edit]
>>2403
All batteries are DC, so it probably isn't that. I don't really know what to say if it doesn't work from a 9v battery, maybe try hooking it up to the 5v or 12v rails of your computer power supply?
35 posts omitted. First 100 shown. [Return] [Entire Thread] [Last 50 posts] [First 100 posts]

View catalog

Delete post []
Password  
Report post
Reason  


[Home] [Manage]


[ Rules ] [ an / foe / ma / mp3 / vg / vn ] [ cr / fig / navi ] [ mai / ot / so / tat ] [ arc / ddl / irc / lol / ns / pic ] [ home ]